The big problem with doing astronomical photography is that if it’s too cloudy, you’re pretty much out of luck.
The other, not quite so big problem, is that an equatorial mount is a kind of arcane looking device. Lots of dials, lots of knobs and gauges. And if you’ve never used one before, it’s not an easy thing to figure out from scratch. Consider this a very basic primer.
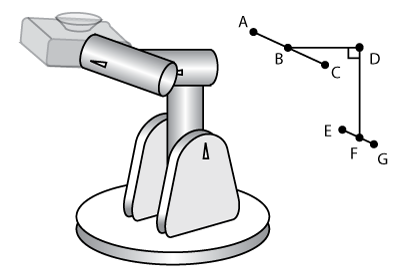
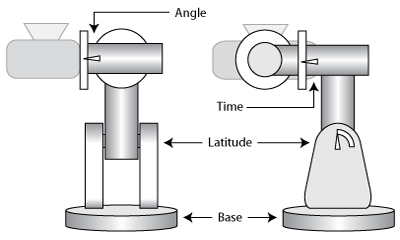
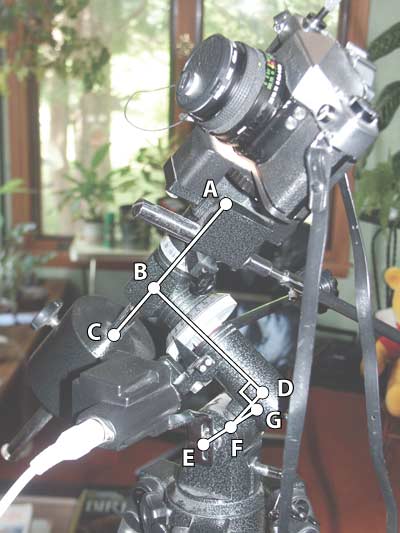
First, the base. This is used to point the planetary axis (line BD) north. Mounted on the base is a tilt mount with an angle gauge. If you set this gauge to your current latitude, it rotates line FD along the axis EG, and puts line BD parallel to the Earth’s axis. Once you’ve done this, everything else is a matter of pointing the telescope (or, in this case, the camera) at your target, and keeping it pointed in the right direction as the Earth spins.
The camera will sit on one end of line AC, with a counterweight on the other. AC rotates around BD, and along itself as an axis. This lets you point the camera pretty much anywhere. Once you’ve done got your subject in sight, you can lock things down and turn on the clock drive motor.
Just in case that wasn’t confusing enough, here’s a shot of the setup I’m using, with the schematic overlay in place.
And, of course, none of this does any good without a clear sky…